In this tutorial you will learn how to integrate the RedCritter Connecter platform with Zendesk, a popular cloud-based customer support tool.
We'll teach you how to create a RedCritter extension in Zendesk, configure a Rewards Store in Connecter, then give Reward Points and add an Action from Zendesk using our APIs, which will then trigger Skill points and Badges based on their configuration.
|
1. Download and extract the contents of ZendeskAssets.zip to your computer.
|
|
|
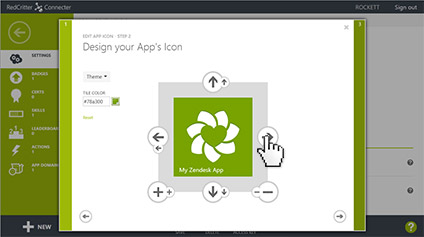
2. Sign into Connecter and Create an App (or App Domain) for your Zendesk integration.
Note: Make sure the Rewards Admin Email is filled out correctly.
|
|
|
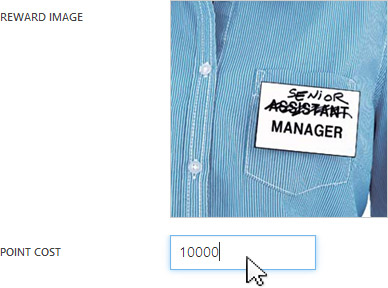
3. Create a Reward for your default App Domain.
|
|
|
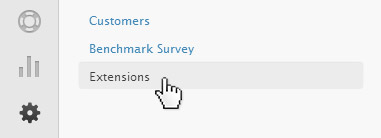
5. Sign in to your Zendesk Administrator account, click Settings and then Extensions.
|
|

|
6. Find and click URL Target.
|
|
|
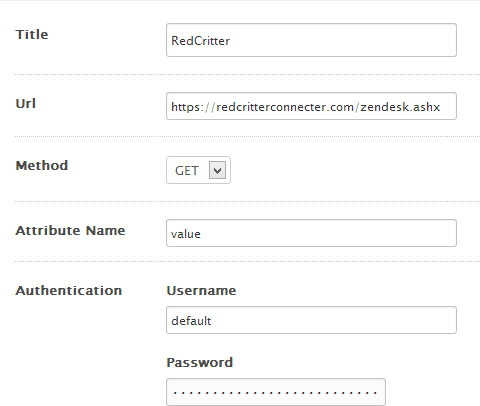
7. Configure your new Target with the following info:
- Title: RedCritter
- URL: https://redcritterconnecter.com/zendesk.ashx
- Method: GET
- Attribute Name: value
- Username: default
- Password: {Your App or App Domain's Secret Key}
|
|
|
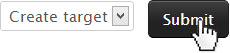
8. Once you've tested your target, click Submit.
|
|
|
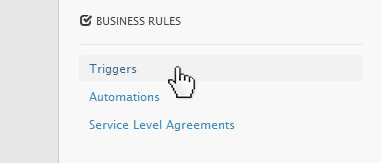
9. In Settings, find Business Rules and click Triggers.
|
|
|
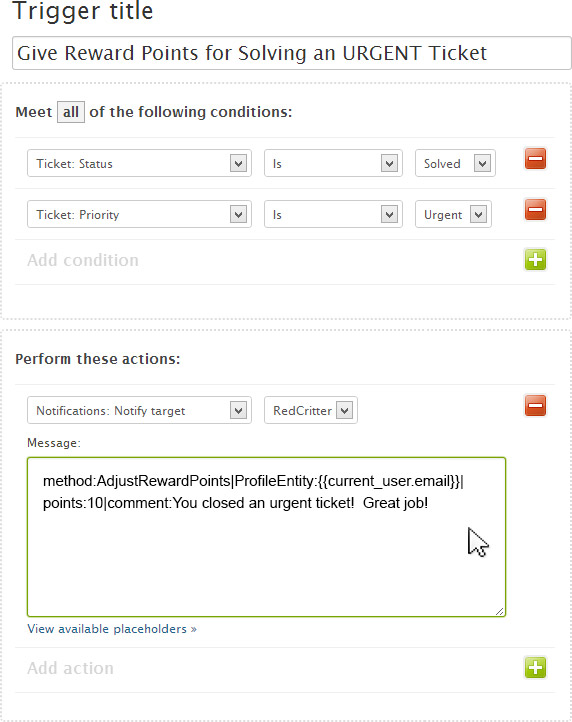
10. Configure a new Trigger to Adjust Reward Points in Connecter:
- Trigger Title: Give Reward Points for Solving an URGENT Ticket
- Conditions: Ticket: Status, Is, Solved
- Conditions: Ticket: Priority, Is, Urgent
- Conditions: Other: Current user, Is not, (end-user)
- Actions: Notifications: Notify Target, RedCritter
- Message: method:AdjustRewardPoints|ProfileEntity:{{current_user.email}}|points:10|comment:You closed an urgent ticket! Great job!
|
|

|
11. Create your new Trigger.
|
|
|
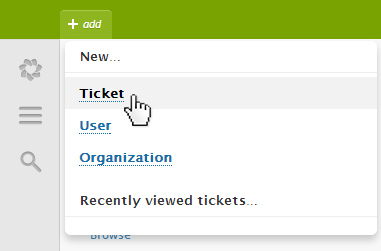
12. To test out your new trigger, Add a New Ticket.
Note: To meet the conditions, make sure the priority is set to Urgent.
|
|
|
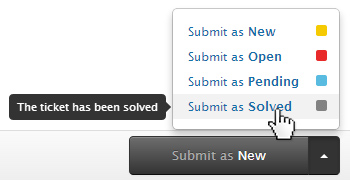
13. Then, Submit the Ticket as Solved.
|
|
|
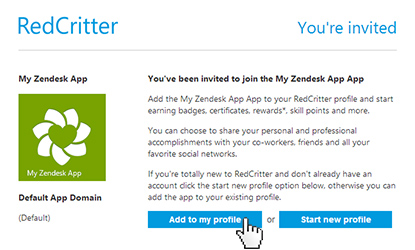
14. Check your (or the user's) email for a RedCritter App Invitation.
|
|
|
15. Make sure you joined the App and received Reward Points.
Note: You can also check your App's activity feed in Connecter.
|
|
|
|
16. Go back to Zendesk. In Settings, find Business Rules and click Triggers.
|
|
|
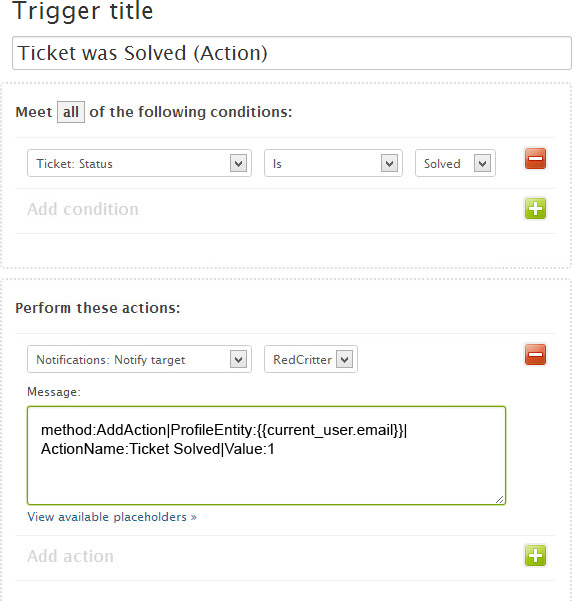
17. Configure a new Trigger to Add an Action in Connecter:
- Trigger Title: Ticket was Solved (Action)
- Conditions: Ticket: Status, Is, Solved
- Actions: Notifications: Notify Target, RedCritter
- Message: method:AddAction|ProfileEntity:{{current_user.email}}|ActionName:Ticket Solved|Value:1
|
|
|
|
18. Create your new Trigger.
|
|
|
|
12. To test out your new trigger, Add a New Ticket.
|
|
|
|
13. Then, Submit the Ticket as Solved.
|
|
|
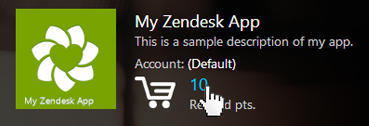
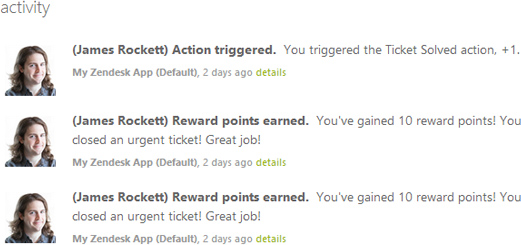
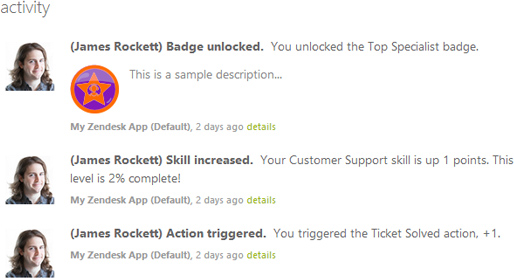
14. Back in Connecter, check your app's Activity Feed for updates.
|
|
|
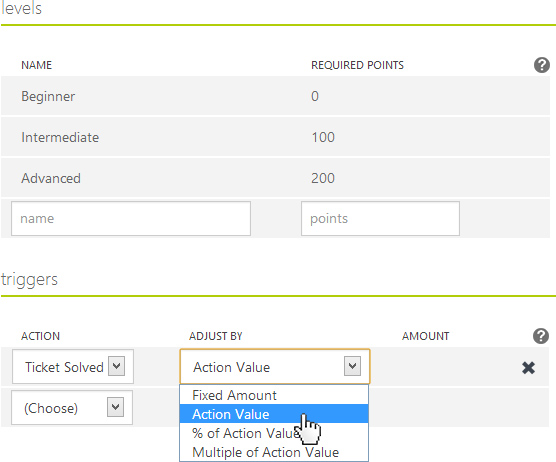
15. Create a New Skill and add your new action under Triggers.
|
|
|
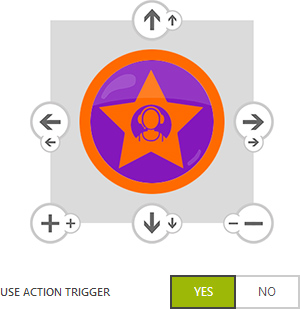
16. Create a New Badge and add your new action under Triggers.
|
|
|
|
17. Go back to Zendesk. To test out your new configuration, Add a New Ticket.
|
|
|
|
18. Then, Submit the Ticket as Solved.
|
|
|
19. Back in Connecter, check your app's Activity Feed for updates.
Note: You can also check your Profile.
|
|
|
16. Back in Zendesk, continue adding as many Triggers as your heart desires.
|
|